Bootstrap Checkbox Label
Intro
In certain cases the simplest aspects might actually become extremely essential-- especially once you get to need them. For instance how do your visitors connect with the web pages you create claiming a simple Boolean action-- simply just yes or no relating to some of the questions you should ask, the way they do approve the conditions or perhaps line up a handful of the feasible options they might possess. We most likely get past this without paying very much of an recognition to the component chargeable for these sorts of activities but the Bootstrap Checkbox Button is certainly a pretty significant component-- one our forms can not actually perform without.
In the current fourth edition of the Bootstrap platform we are provided with the .form-check and also .form-check-label classes so as to reveal the good old default checkbox element and in case you would probably want them piled simply just ensure you have actually wrapped them inside an extra <div> with the .form-check class appointed to it. In order your checkboxes to present appropriately in Bootstrap 4 you ought to additionally select the .form-check-label class to the <label> element and the <input> tag in itself should have the .form-check-input class.
The way to use the Bootstrap checkbox:
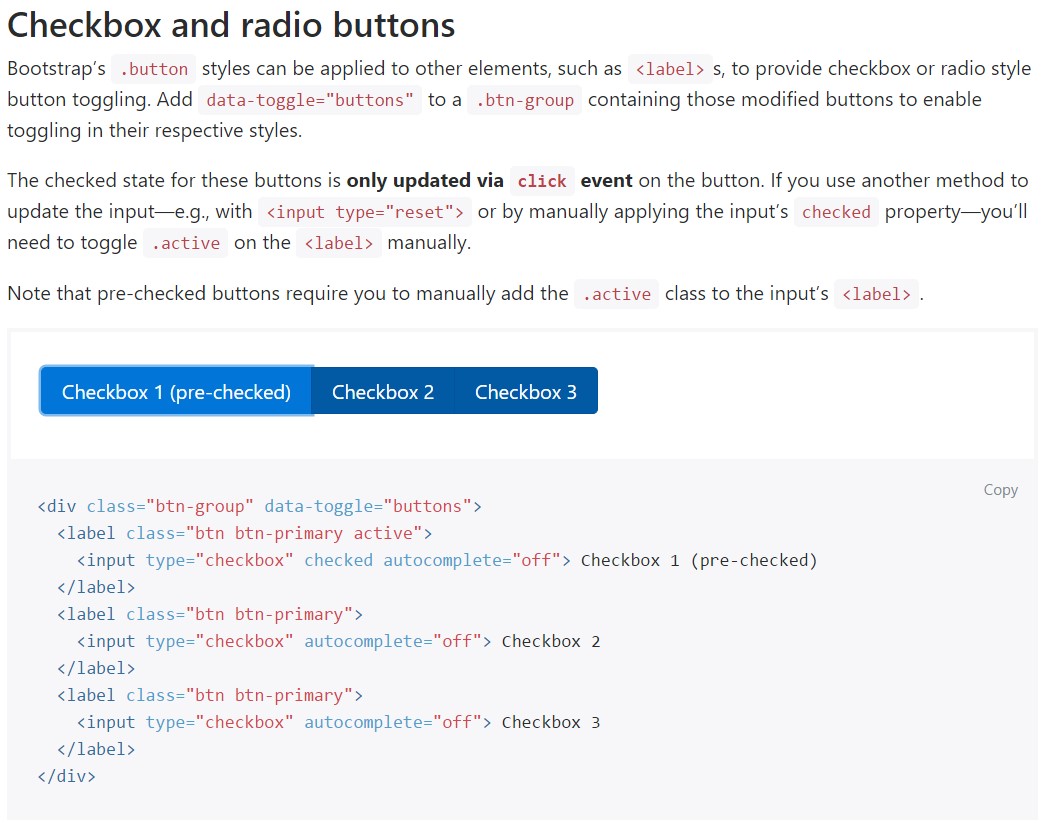
The reviewed status for these kinds of buttons is only up-dated by using click event on the button. If you work with one more method to upgrade the input-- e.g., with <input type="reset"> or by manually applying the input's examined property-- you'll will need to toggle .active on the <label> manually.

<div class="btn-group" data-toggle="buttons">
  <label class="btn btn-primary active">
    <input type="checkbox" checked autocomplete="off"> Checkbox 1 (pre-checked)
  </label>
  <label class="btn btn-primary">
    <input type="checkbox" autocomplete="off"> Checkbox 2
  </label>
  <label class="btn btn-primary">
    <input type="checkbox" autocomplete="off"> Checkbox 3
  </label>
</div>
Sometimes we need the checkboxes to take place within our forms without the site visitor actually having the capacity to get any type of action selecting them-- that is definitely where the disabled option shows up.
To disable effectively a checkbox in Bootstrap 4 employing the basic HTML attribute disabled attribute along with just including it you could quite possibly in addition format the pointer in case the visitor hovers over the disabled component making it to a "not allowed " icon generating your forms more easy and instinctive to work with.
In case you like the tip and indeed wish to carry this out you must appoint the .disabled class to the parent .form-check element needed the effect to showcase ideal while the whole feature has been hovered-- this will get considerably even more clear
An additional case
Whenever working with checkboxes, wrap all of them in a <label> element by having the Bootstrap 4 .custom-control as well as .custom-checkbox classes employed.
Utilize .custom-control-input to the certain <input> element.
Additionally employ two <span> elements: one with the .custom-control-indicator class utilized, and the other with .custom-control-description ( plus place the original label within this element).
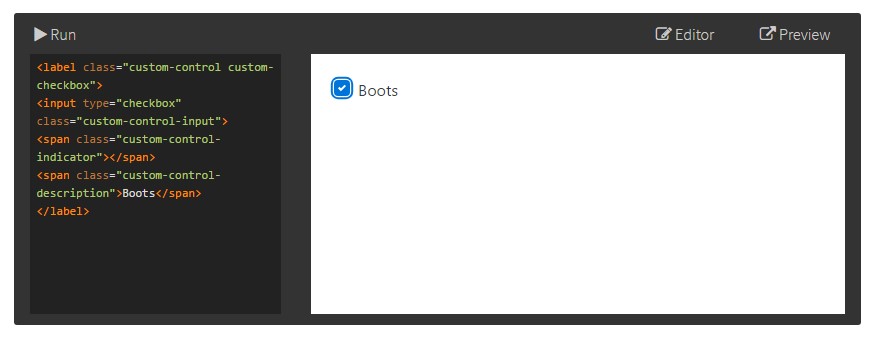
<label class="custom-control custom-checkbox">
<input type="checkbox" class="custom-control-input">
<span class="custom-control-indicator"></span>
<span class="custom-control-description">Boots</span>
</label>
Bootstrap Checkbox Position forms
Default checkboxes and radios are developed upon with the assistance of .form-check, a singular class for both input types that increases the layout and activity of their HTML elements. Checkboxes are for selecting one as well as a number of selections within a list, when radios are for selecting just one option from many.
The disabled class is going to also light up the text color tone to help reveal the input's state.
A brand new component for the Bootstrap edition 4 system is the introduction of the so called custom form components. These are the same features we are known in capability although styled far more attractive and with the Bootstrap method. Having them you can certainly add special excitement as well as personality to your material by simply selecting a handful of supplemental classes to the commands you involve in your forms.
If you want to use custom checkboxes wrap them inside a <label> element appointing to it the .custom-control and .custom-checkbox classes. Anytime developing the <input> element make certain you have actually as well provided the .custom-control-input to it. You have to also utilize two <span> elements - one having .custom-control-indicator class utilized and some other carrying the .custom-control-description class coupled with the actual information you would undoubtedly require to attach to the label your Bootstrap Checkbox Form.
Final thoughts
That's basically all you should produce in order to place a checkbox element for your Bootstrap 4 powered websites and add a number of custom-made flavor to it providing it a fantastic looks. Currently everything you need to do is repeat the drill unless you've reviewed all of the checkboxes needed are already on the page.
Look at some youtube video guide regarding Bootstrap checkbox
Linked topics:
Bootstrap checkbox approved records
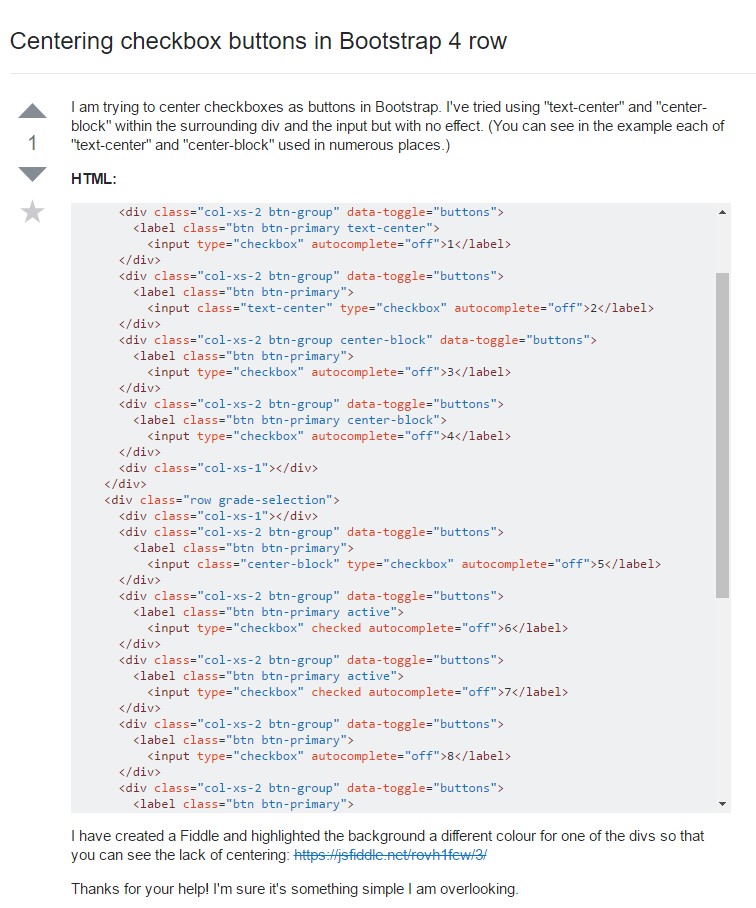
Centering checkbox buttons in Bootstrap 4 row
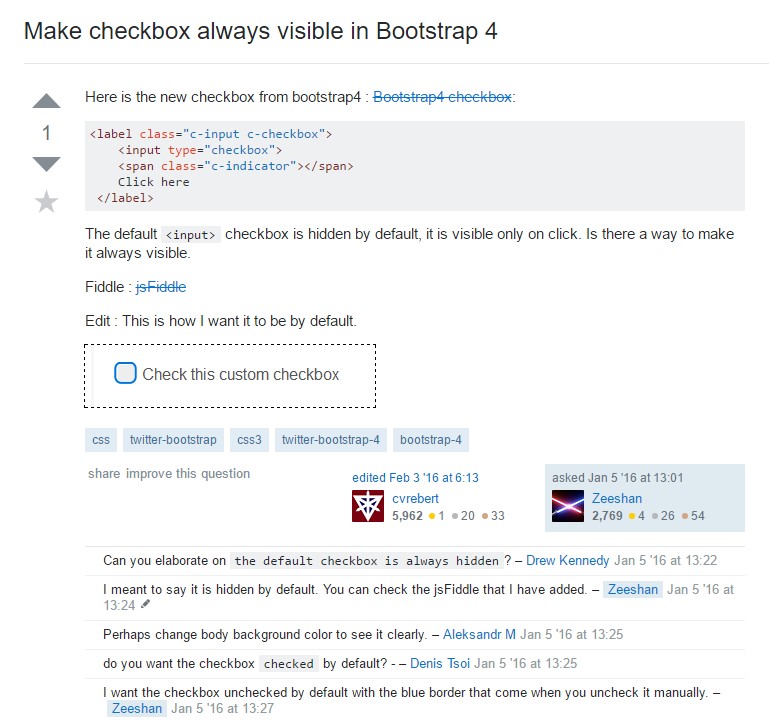
Make checkbox always visible in Bootstrap 4